Striving to create a home strong in the foundations of love, respect, and God's truths ...
Showing posts with label holidays. Show all posts

Wednesday, April 16, 2014

Mid-week Missions: Resurrection Activities for Kids


Great activities abound at this time of year - and I think that when working with kids, the very best ones are those that point to the cross.  We need to be sure that our children are hearing the story of Jesus' love and sacrifice over and over, learning the layers and shades of meaning and great love that are woven throughout.

That means that this week we're having "Easter School" at our house.  Each day we're doing a different activity that points to the cross.  While I don't have finished pictures from all of these to share yet, I can point you to where I found most of these ideas, so here they are -our favorite Resurrection activities for Easter.


1.  Resurrection Garden - This has been making its way around Pinterest, and we decided to try it this year.  We planted it several days ago and hope that it begins to sprout by Easter - but if it doesn't, we'll enjoy it next week.  The kids loved planning the layout of the garden and finding the perfect rock to seal the tomb - and as the week goes on, we'll be adding crosses to our garden.

2.  Resurrection Eggs - Directions abound for what to put in these eggs if you choose to make your own, but I purchased mine years ago during an 'after Easter' sale at a local Christian book store.  I've been using these to tell the story to My Big Helper and My Little Man for about six years now, and they get excited each time we pull out the bright orange egg carton.  This is a great way to make the storytelling interactive, and the symbols help the smallest children remember the main points of the story.


3.  "The Crossmaker" by See the Light Shine - This set of Easter-centered art projects is awesome!  There are lessons using creative lettering - seen above and below - as well as chalk pastels, watercolors, a story, and some really neat bonus features.  We're having fun working through these lessons together, and I appreciate the way that the Bible stories are so well tied into art projects where the kids are learning and producing 'masterpieces' that I can display and keep for years to come.


4.  Easter Cards - We send cards to our extended family members every holiday season, big or small.  At least, we try to - it's one way that we try to stay in touch with people who are far away. This year the kids chose to make cards several different ways, so not everyone will be getting the same style of cards, but some will be receiving this one.

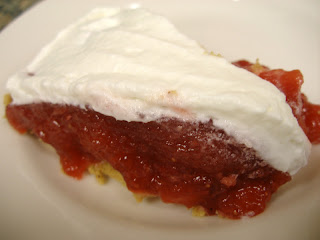
5.  Empty Tomb Resurrection Cake - I don't think that our cake is going to look quite like this, but I am excited about the idea of morphing our traditional Bunny Cake into a Resurrection Cake.  I think we're going to have fun building a sugary garden, too, and I love the meaning that we can build into that.

6.  Resurrection Rolls - This has been a popular side dish for years, and it never gets old around here.  We'll make and serve these at our Easter feast. 

7.  An "Easter" Seder Meal - We're actually doing this twice this week - once with our church and once with our school group, but it's a pretty exciting event.  At the first one there was a Jewish rabbi and a Duke Divinity Professor present, and while one taught us the traditions involving the Seder post-Temple, the professor pointed to how Jesus fulfilled those traditions.  It was a great experience that led to a rather deep discussion with My Big Helper upon arriving home.

8. Resurrection Cookies -  This is a really fabulous way for young children to understand the story of the Resurrection.  It takes two days to complete, and you'll need a Bible and some unusual cookie-baking ingredients, but it's well worth the time and trouble.  The directions for these cookies follow the Easter story so closely that the recipe consists of scripture - and you look up each reference and then do to the ingredients what it says.  Meaning that you'll taste the 'sour wine' vinegar that Jesus was given when He thirsted on the cross. You'll smell and taste and use all of your senses as you move through the story - and end up with 'empty,' hollow cookies at the end.

How will you point your children to the cross this week?

Monday, July 1, 2013

Our Favorite Picnic Food Recipes

Independence Day is only days away, and many of us celebrate with family and friends while having an old-fashioned picnic.  This year, we'll be doing the same - and we're very excited.

Here are our favorite picnic (or Fourth of July) recipes:


http://www.anestintherocks.blogspot.com

What are your favorite picnic foods?

For more Menu Plan Mondays, visit OrgJunkie.

Thursday, June 6, 2013

{Man-Friendly} Grilled Steak Salad


A few days ago I tried to figure out how to combine my husband's love of steak with my desire for a good salad.  This {Man-Friendly} Grilled Steak Salad is the result.

I foresee us grilling this salad often this summer.  It's a quick and easy dinner that keeps all the heat out of the kitchen, but it's also colorful, hearty, and full of flavor.  

This could even be a fun Father's Day option!

So here's how to make your own {Man-Friendly} Grilled Steak salads.

Ingredients:

  • 1 pound of thin steak
  • 3/4 t. Montreal steak seasoning
  • 4 T. Worcester sauce
  • 2 T. olive oil + oil for the grill pan
  • 1-2 heads of romaine lettuce
  • 2 carrots
  • 1/2 c. shredded sharp white cheddar
  • 1 green bell pepper, sliced
  • 1 onion, sliced
  • 1/2 c. frozen kernel corn
Directions:
  1. Preheat the grill to about 350.
  2. Toss the onions and peppers with olive oil and steak seasoning.  
  3. Oil the grill pan and place on the grill to heat.
  4. Chop lettuce, carrots, cheese, and tomato.  Assemble salads on 4 plates.
  5. Put the peppers and onions in the hot grill pan to caramelize.   Stir occasionally.
  6. Place the steaks on the grill and top with Worcester sauce.  Grill until they reach your preferred level of doneness.
  7. When finished, remove steaks and veggies from the grill.  Allow steak to rest, then slice into strips.
  8. Add veggies and steak to the top of the salad.
  9. Serve with your favorite salad dressing and enjoy!
How do you celebrate Father's Day?

Friday, March 15, 2013

Write Your Own Irish Blessings

Okay, I realize that if you write them yourself, they won't really be Irish (unless you are) but this is a fun introduction to poetry and a way to think about others while studying a neat aspect of Irish culture.

We began by reading some traditional Irish blessings.  We found a bunch over here.  Of course, we had to read my favorite:  


May the road rise up to meet you.
May the wind always be at your back.
May the sun shine warm upon your face,
and rains fall soft upon your fields.
And until we meet again,
May God hold you in the palm of His hand.

Then we set to work.  We always send 'Happy Saint Patrick's Day' cards to our relatives, so we broke out the white and green paper, the rubber stamps and ink pads, and some stickers.  I let the kids create their cards however they wanted, as long as they wrote a message inside.  My Big Helper's had to contain some kind of blessing.  

At first she wanted to copy blessings from the website, but we continued to talk about the format.  The neat thing about many Irish blessings, practically speaking, is that they follow a simple pattern.  "May you" followed by a good thing.  Soon she wanted to write her own.

My Big Helper got creative with this.  She really had fun with this assignment, and I think each card will bring a smile when it's opened.  


Have you ever 'studied' Irish blessings?  What would you include in one?

This post was shared at I Can Teach My Child.

Friday, November 9, 2012

Life as a Pilgrim - Part Two: Daily Activities

This week we got together with friends once again to live life as a Pilgrim.  We focused on activities of daily life this time, and began our work by learning about the clothing that the children would wear.


After reading Samuel Eaton's Day and Sarah Morton's Day, both by Kate Waters, we grabbed three petticoats and an apron.  The girls each put on all of these layers to see what it felt like to wear so much clothing at one time.  They were all quite certain that they'd stick to their jeans!


Next, we moved to the table and began to make poppets out of cardboard and fabric.  Using the pictures in the books as guides, the kids each dressed their poppets in the clothing worn by the pilgrims then.  They cut out clothing from fabric and used yarn as garters to hold up their stockings.  They worked for a very long time on this, determined to get each layer just right.  


Mine were very excited about their finished product.


Don't they look great?


By this time we were all quite hungry, so we headed for a Pilgrim lunch in the kitchen.  After working together to set the table with plates and spoons, the kids stood by their plates - as children did then - and carefully placed their napkins on their shoulders.  They were less than pleased, however, when I put five kernels of corn on their plates.  After talking about how sick the Pilgrims were that first winter, about how that may have been due to their lack of nutritious food and disease, about how some days this was just all they had, the kids sadly ate their corn.  They were quite upset with me ...


so we handed them their journals and let them write.  Each child expressed his/her displeasure well through writing.  My Little Man used exclamation points for the first time, declaring the corn to be "hard."  Another child stated that if he had been a Pilgrim, he likely would have starved, although he would have eaten the corn since there wasn't anything else.  

When they finished their writing, they cheered as we brought out their 'real' lunches, and headed outside happily for a picnic.


Next we learned about Pilgrim furniture.  After talking about the difference between beds for adults and beds for kids, they stuffed large burlap bags with straw.  Each child took turns laying on it.  They finally decided that this whole process was a lot of fun, but that they preferred their own beds to these scratchier ones.


Our last activity of the day was to dip candles.  While the Pilgrims bought their candles from England for the first few years, being too focused on survival to have time for candle dipping, we thought this would be a good way to see the work that went into having light during this time period.  Besides, someone was dipping candles for the Pilgrims!

The kids really enjoyed this process, although they got most excited about it when their candles began to grow fatter.  This took a long time, and when the kids learned that a typical candle has 200 dips, a few were rather discouraged.  


I took this picture when we were about halfway through the process and at the time, this was the biggest candle.  She was so excited with her finished product that she began a second candle!  All of the kids decided that they wouldn't want to be dependent upon their own candle-making abilities for light - but that this was a fun process, at least for a few minutes.

Next week we're taking a field trip to learn about the Pilgrims' journey on the Mayflower and games that the children might have played.  Come back to join us!

You can read about our Pilgrim cooking adventure here.

How are you preparing for Thanksgiving?

This post was shared at:


Saturday, December 31, 2011

6 Ways to Say Thanks


Back in the prehistoric era, before email existed, people sent thank you cards.  It was considered the polite thing to do, and nearly everyone sent a handwritten card to acknowledge a gift, service, or visit.

Nowadays thank you cards seem nearly obsolete.  Even after more formal events, like weddings and baby showers, cards are not always sent.  Sometimes thanks are sent digitally, and sometimes this custom is foregone altogether.

But I don't understand that.  When a gift is given, isn't it merely common courtesy - plain old-fashioned good manners - just to say 'thanks?'  Aren't our loved ones' feelings worth the few minutes that a card takes?


So since our children were born, we have sent thank you cards for gifts, visits, and events.  We especially work hard to show our thanks for birthday and holiday gifts.

This practice can actually be very educational - and fun, too.  Here's a few simple ways to do 'thank-yous' that are age appropriate and fun:

  • Take a picture of your young child with a sign that says, 'Thanks.' S/He could be awake or asleep, an infant or a toddler - but any picture of your child will be cute.  Slide the picture into a store-bought card or attach it to the front of a piece of paper.  Write a simple thank you as if from him/her inside.  For fancier cards, you could have your pictures printed professionally as cards.  Many printing companies do this.
  • Let your child paint or color a picture on a blank piece of paper.  On the other side, write their own words saying 'thank you' for the gift.  Include a picture of your child opening or playing with the gift.
  • Have your children create pictures on index cards.  For very young children, write inside a note card for them and include their art.  This is an easy way to send cards for multiple young children!
  • For beginning writers, use big paper and a light-colored marker.  Write a short, simple message for them and allow them to trace your writing with a dark color.  They get handwriting practice and to learn good manners at the same time!
  • Write the notes for your child in a blank note card and let them sign their own name.  Eventually, they'll be able to write the 'love, name' part, and soon a whole sentence:  'thank you for the ___.'
  • Finally, turn the thank you cards into a family project.  Get out paper, scissors, crayons, markers, paints, glue, stickers and gently-used wrapping paper and allow the children to go to town.  You can even make your own envelopes out of construction or other paper for those larger-than-usual creations!

We usually make a few each day until we're finished.  This way the children don't feel overwhelmed and the cardmaking remains a fresh, fun project for the duration.

How does your family say 'thanks?'

Shared over at I Can Teach My Child.

Friday, September 2, 2011

Making Memories: Stepping Stones


I like involving my children in gift-giving as often as possible, and since our parents need little in the way of traditional, storebought 'gifts,' we usually try to make them something unique.

About the time my son was born, my dad became a Master Gardener through Cooperative Extension and Penn State University.  He started adding to his garden, and so we decided to make them stepping stones for Grandparents' Day!

This was super easy to do with both my four-month-old son and my Big Helper, who was about two then. It worked with our budget, too!

We went to Lowe's and hit the gardening section.  They have many kinds of gardening tiles with a variety of shapes and finishes.  (You can pour your own from cement if that's your thing, of course, but this worked for me - and each tile was only a few dollars.)

On a washable surface, prepare your paint on a flat, disposable or washable plate, a foam brush, and baby wipes or wet cloths.  With the baby/child seated in your lap, hold up a little foot and paint the bottom.  When it's good and wet, gently press it onto the tile to make a footprint.  Wash the painted foot carefully, and then repeat with the other foot to make it look as if s/he walked across the tile.


On the edge, I painted the name and date, and then I repeated this procedure for the other child.

When finished, spray with a sealant to prevent fading or flaking, and  voila!  You've got simple, unique stepping stones!

What are your children giving their grandparents for Grandparents' Day?


”I

Thursday, June 16, 2011

DIY Father's Day T-Shirts

With Father's Day rapidly approaching, it's time to be making your gifts!  Here's what we did last year for Daddy (we can't share this year's project since the big day isn't here yet - we don't want him getting wind of our plans!)

Since Daddy needs t-shirts and he's very particular about the ones that he likes, we decided to try making some to meet his specifications.  :-)

First, we bought shirts in good, paintable colors:  charcoal gray and forest green.


Then, I drew the words I wanted on each shirt in solid, block letters with a piece of light-colored chalk.  My Big Girl at 5 was able to handle painting her own words.  (I expected them to be pretty messy, but she did amazingly well.  I guess I didn't give her enough credit!)

I mixed one part acrylic paint with one part fabric medium.  Using a stiff-bristled brush, scrub the paint into the fabric.  (It's a good idea to put an old cookie sheet or piece of cardboard inside the shirt and masking tape it tight to hold it in place before painting.)

When my Big Girl had finished with her words and I had painted my Little Man's, it was time to do their hands.  We used a contrasting color and dipped one hand at a time into the paint, stamped it on the shirt, and then wiped it clean before doing the next one.


My Little Man's hands made a heart, while my Big Girl's just showed the size of her hands.

After drying for several hours, I pressed the shirts with a light iron and then washed them with some salt in cold water.  That sets the paint so it won't fade or wash away.

Voila!  Personalized shirts for Daddy in just a few hours!


Wednesday, December 22, 2010

Little Boy Gifts

This year, a lot of our grandparent and great-grandparent gifts will be homemade.  It's always a struggle to find things to buy for them anyway, and this year the funds just aren't there for extravagant gifts for everyone on our list.  I decided to have the kids tackle these gifts, but it was hard to find a good project for Luke to make.

There's always pictures OF him, and they're cute - but he doesn't do much but pose, and he hates that.  He could MAKE a picture, but so far he only likes to draw storms and snakes, and they're still kind of hard to tell apart.  You can't rush fine motor skills!  I could use HIM to make a picture, like a handprint something or other, and they are always cute, but Luke would have very little involvement or creative input - I would do all the work.

I finally decided to let him make pine cone bird feeders.  This is an oldie where I come from, but I was surprised to learn when I started working at a local preschool that the director there had never seen this, so maybe it will be new to you, too.

You'll need a pine cone or large plastic disposable cup, some string, a few tablespoons of peanut butter per feeder, a craft stick or plastic knife, a small sandwich baggie, and a few handfuls of birdseed.

First, cut a length of string and make a loop about an inch in diameter.  "Lasso" the smaller end of the pine cone with the loop.  If you're using a cup, poke a small hole in the bottom of the cup, knot the end of the string, and feed it through.  When finished, this will be the hanger for the feeder.  (Luke thought that he was the best string cutter ever and laughed and laughed while doing this.  It's the little things, you know.)


Using the craft stick, smear peanut butter on the pine cone, covering the whole thing.  Luke's started out like this ...

and ended up looking like this when he finished:


After you've thoroughly smeared your pine cone and gotten very sticky, put it in a dish with your birdseed.  Roll it around or scoop the birdseed up and sprinkle it on top of the pine cone.  It will stick nicely.


 Luke couldn't resist licking off some stray peanut butter.  It's clean - and an extra seed is healthy, right??  ;-)


After liberally covering the peanut butter in birdseed, your pine cone should look like this:


To keep it neat (and prevent me from vacuuming up birdseed for weeks) we then wrapped the cone itself in a sandwich baggie.  I let the string hang outside so it wouldn't get sticky.  We found that our smallish pine cones fit well inside rectangular butter boxes and we wrapped them right away.  When the grandpas open them, they'll be ready to tie onto a low branch or beam and watch the birds enjoy!